Google Chrome is widely renowned for its features, fast browsing experiences and privacy related concerns. Its included features makes it quite a powerful contender in compare to other available browsers. However, the people’s trust over this browser also makes it an attractive target for online threats. Therefore, it’s quite necessary to safguard your Google Chrome experiences against possible potential risks.
Quick Links
So, in this article, we have discussed about various robust security features included by Chrome that easily helps users for blostered protection. Let’s check out the recommended security practices to safeguard your Chrome browser in easy steps.
Essential Security Tips and Features In Google Chrome
Embrace Secure Connections (Always use HTTPS)
Activating the “Always use secure connections” feature is your first line of defense. This ensures that every time you connect to a website, Google Chrome insists to seek a secure connection and visit only websites with HTTPS enabled. Although not every sites supports the ‘HTTPS’ Protocol, still enabling this feature ensures your interaction to be encrypted, no matters the initial connection is secure or not. Here are the steps through which you can enable this feature to safeguard your sensntive details.
How to enable “Always use secure connections”:
- Open Google Chrome.
- Click on the menu.
- Select “Settings.”
- Navigate to “Privacy and security.”
- Click on “Security.”
- Enable the “Always use secure connections” feature.

Enabling Secure DNS
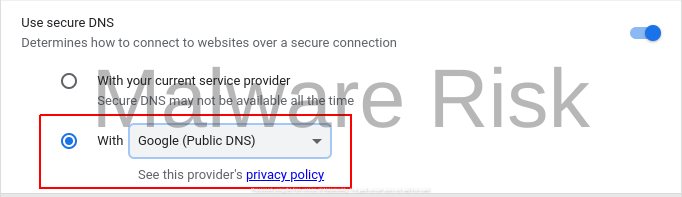
Using Secure DNS, is another recommendation to enhance your online privacy and security with Chrome. This lets the Google Chrome to use actually a secure DNS server such as DNS-over-HTTPS (DoH) or DNS-over-TLS (DoT), while transcripting domain name to IP addresses. With the help of these protocols, the communication between the browser and DNS server remains encrypted, fortifying your sensitive information against unwanted access and manipulation by external entities.
How to enable “Use secure DNS”:
- Open Google Chrome.
- Click on the menu.
- Select “Settings.”
- Navigate to “Privacy and security.“
- Click on “Security.”
- Enable the “Use secure DNS” feature and choose your preferred alternative DNS provider from the list.
Activate Enhanced Protection
The use use Enhanced Protection in Google Chrome is another proactive defense mechanism that prevents hazardous websites, downloads, extensions, and even more. Enabling this feature also warns you against potential password breaches. The only downpoint is, it sends your browsing data to Google, but when it comes to security, you can adjust with this.
How to enable “Enhanced protection”:
- Open Google Chrome.
- Click on the menu.
- Select “Settings.“
- Navigate to “Privacy and security.“
- Click on “Security.“
- Enable the “Enhanced protection” feature.

Activate Two-Factor Authentication
2FA or Two-Factor Authentication now become very popular nowadays and used by most of the service providers over web. This easily enables users to secure their data and privacy by authenticating their action through successful verification of their identity.
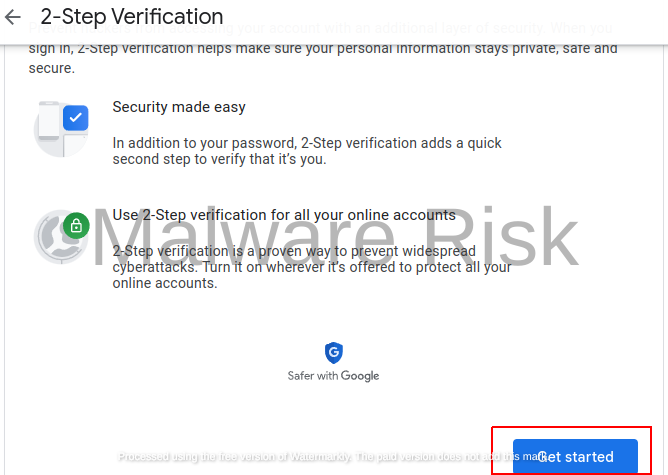
Even if you use Google account, it’s a high recommendation to enable 2FA that includes extra layer of security. So, whenever you try to access your account, it will seek a second authentication as well in addition to password authorization. Generally, 2FA can be authenticated by sending text message to your phone, using and authenticator app, physical security key, etc. With the use of this feature, easily thwarts unauthorized access to your Google account. To activate this in Chrome, refer to steps ahead.
How to enable Two-Factor Authentication:
- Open Google Chrome.
- Visit https://myaccount.google.com/security.
- Log in with your Google account credentials.
- Click on “Security.”
- Click on “2-step verification.“

- Initiate the setup process.
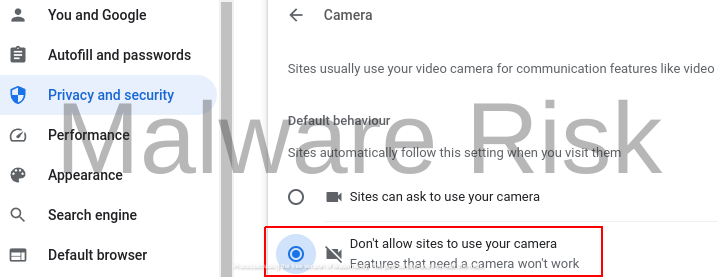
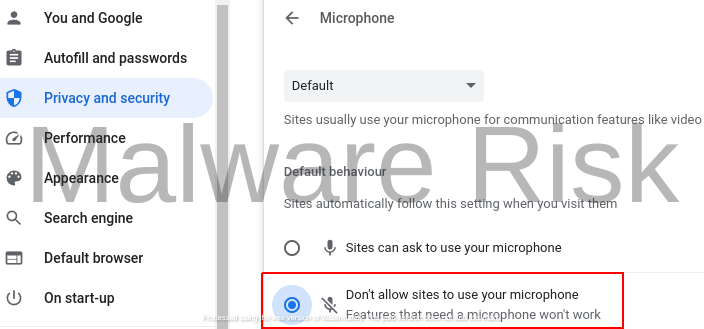
Disable Location, Camera, and Microphone Access
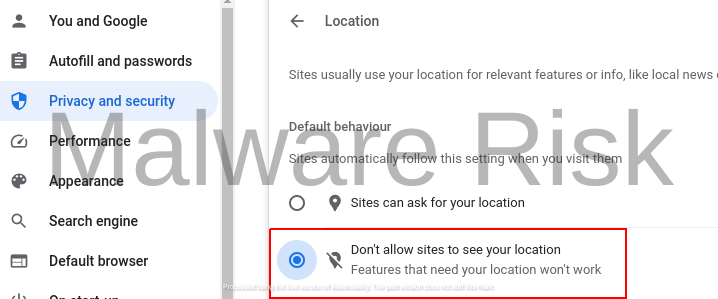
For added privacy and security measurs, you can also consider disabling location, camera, and microphone access in Google Chrome. This prevents websites from requesting access to these functions, ensuring that your location, camera, and microphone remain secure.
How to disable location, camera, and microphone access:
Disable location: Type “chrome://settings/content/location/” in the address bar and enable “Don’t allow sites to see your location.“
Disable camera: Type “chrome://settings/content/camera/” in the address bar and enable “Don’t allow sites to use your camera.“
Disable microphone: Type “chrome://settings/content/microphone/” in the address bar and enable “Don’t allow sites to use your microphone.“
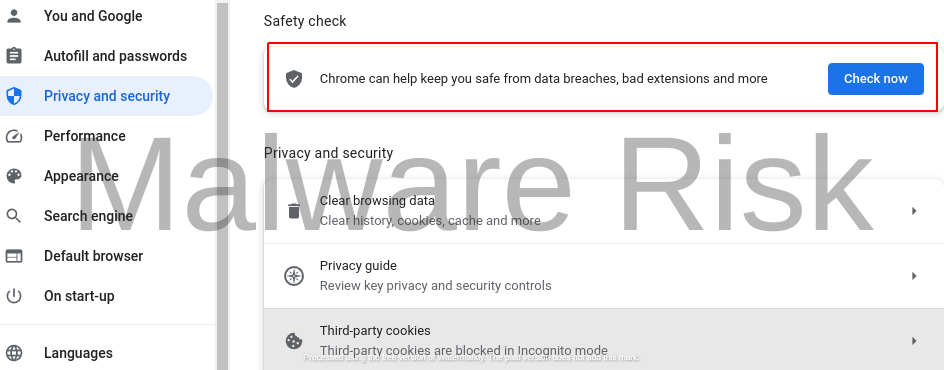
Conduct a Safety Check
In today’s digital landscape, where we rely heavily on web browsers like Google Chrome, prioritizing browser security is paramount. Google Chrome offers a “Safety Check” to assess potential risks, including checking for updates, password security, the use of security keys, malicious extensions, and scanning for harmful software on your computer.
How to run a Safety Check in Google Chrome:
- Open Google Chrome.
- Click on the menu.
- Select “Settings.”
- Navigate to “Privacy and security.“
- Click the “Check now” button under “Safety check.“
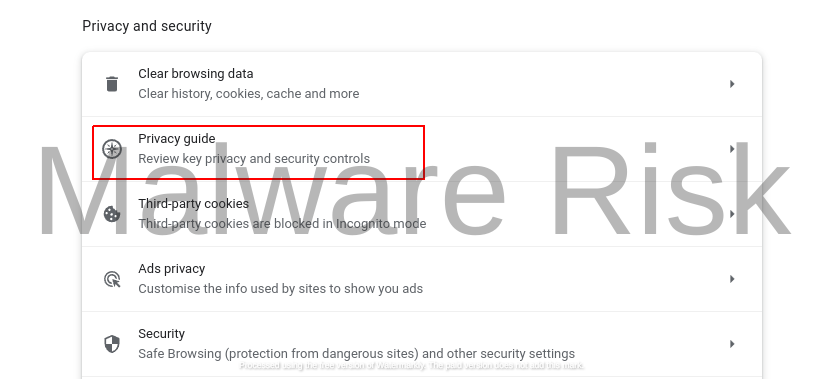
Explore the Privacy Guide
In recent Google Chrome releases, a privacy guide has been introduced to assist users in navigating privacy settings. This guide provides insights into various Chrome features, highlighting their advantages and disadvantages in a tabulated format. By reviewing these considerations, you can make informed decisions about enabling or disabling privacy features based on your preferences.
How to access the Privacy Guide in Google Chrome:
- Open Google Chrome.
- Click on the menu.
- Select “Settings.“
- Navigate to “Privacy and security.“
- Click on “Privacy guide.“
Conclusion:
Although we are known to a number of browser options available in the market, but the Google Chrome stands for its robust features and security instances. It allows users to deal with every possible checks and options to assure privacy and security as well. In this article we discussed various steps through which browsing experiences can be enhances and secured. We hope this might helped you to learn something new today. If you notice something wrong in the steps or article, Click here to suggest an edit.

Nishant Verma is a senior web developer who love to share his knowledge about Linux, SysAdmin, and more other web handlers. Currently, he loves to write as content contributor for ServoNode and also collaborated with MRLabs now.