
We are constantly exposed to different types of threats and annoyances, and one such inconvenience is the incessant notifications from websites like Asemolgaa.com. It is important to understand the nature of these notifications and the potential risks they may pose to your privacy and the smooth operation of your devices. Push Notifications can be useful tools when used correctly, providing updates and alerts that help us stay engaged with websites of our interest.
Quick Links
However, when they become intrusive, knowing how to disable them is of utmost importance. This document aims to provide an insight into what Asemolgaa.com notifications are, enabling and disabling notifications in popular browsers, detailed steps on disabling Asemolgaa.com notifications, and lastly troubleshooting and prevention tips.
Introduction To Asemolgaa.com Popups
Asemolgaa.com notifications refer to a series of messages, ads, and prompts that a user may receive when the Asemolgaa.com site is visited or its extensions installed unknowingly. These notifications are often considered an element of potentially unwanted programs (PUPs) or adware.

The main aim of Asemolgaa.com notifications is often to generate revenue by driving traffic towards affiliated websites or boosting interaction with paid ads. They typically do this by bombarding the user with incessant pop-ups, banners, or hyperlinked texts within their web browsers, be it Chrome, Firefox, or Edge.
Threat Summary:-
| Threat Name: | Asemolgaa.com |
| Threat Description | It’s a recently discovered browser hijacker or a pop up virus meant to display frequent advert pop ups on screen and encourages users to interact with those. However, the interaction can be disrupting to users in all forms, so it’s better to stay away against those. |
| Threat Type: | Browser Hijacker, Adware, Pop-up Virus |
| Threat Symptoms | Modified settings in browsers, Frequent pop ups or redirect issues while browsing the web, Redirects to fake commercial or suspicious web addresses, etc |
| Threat Distribution | Free Downloads, Deceptive Advertisements, Fake Error Messages, and more. |
| Threat Removal | For efficient detection and removal of this threat, refer to instructions discussed under this guide. |
Potential Risks of Asemolgaa.com Popups
The continuous Asemolgaa.com notifications are not just irritating, but they may also pose some potential risks to your device’s security. Here are some of the risks that might come along with these notifications:
- They may deliver questionable or misleading content that pushes the user to purchase unnecessary or counterfeit goods.
- They could potentially expose your sensitive information, such as your browsing habits or even personal data. This data can then be used for various malicious activities, like identity theft for example.
- As these notifications are coded to redirect a user to specific websites, they may unknowingly lead you to dangerous or fraudulent web pages that may contain malicious scripts or software.
Enable/Disable Push Notifications
Understanding Notifications: The Basics
Notifications are alerts generated by websites on your browser to keep you updated on specific content, such as new emails, social media activity, updates, etc. The criteria for these notifications vary per website. While these can be useful, too many notifications can be overwhelming. Controlling these notifications is possible and can be customized in browsers like Google Chrome, Firefox, and Safari.
Notifications Settings in Google Chrome
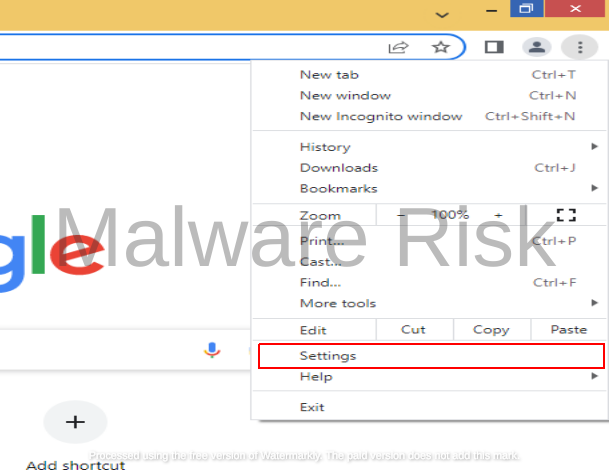
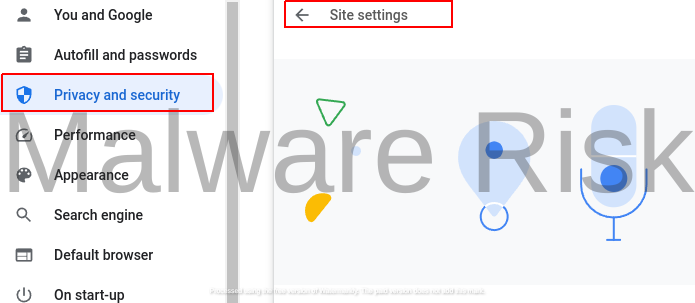
In Google Chrome, you can navigate to the settings page to control the notifications. Click on the three vertical dots on the right corner of the browser and select ‘Settings’. On the left pane, select ‘Privacy and security’. Then click on ‘Site settings’, scroll down to ‘Permissions’ and click on ‘Notifications’. This is where you can allow or block notifications from all sites or customize settings on a per-site basis.

Notifications Settings in Firefox
For Firefox, click on the menu button (represented by three horizontal lines) on the right corner and choose ‘Settings’. From there, select ‘Privacy & Security’ from the left pane, then scroll down to the ‘Permissions’ section. Here, you will find a ‘Notifications’ setting. Click the ‘Settings’ button next to ‘Notifications’. A window will pop up where you can modify the notifications settings. You can block new requests, or alter settings for individual websites.

Notifications Settings in Safari
In Safari, click on ‘Safari’ in the menu bar and then select ‘Preferences’. Click on the ‘Websites’ tab and find ‘Notifications’ in the left sidebar. A list of websites seeking the provision to send notifications will appear. You can choose to ‘Deny’ or ‘Allow’ notifications for individual sites.

Guide to Remove Asemolgaa.com Notifications
Steps to turn off push notifications on ChromeTo turn off push notifications on Chrome, follow these simple steps: Step 1: Open Chrome and click on the three vertical dots in the top-right corner of the browser window.
Step 5: In the Notifications settings, choose the option "Don't allow sites to send notifications" to turn off push notifications completely.
Step 6: Alternatively, you can manage notifications on a per-site basis by scrolling down to the "Allowed to send notifications" section and selecting the websites from which you want to receive notifications. Steps to turn off push notifications on FirefoxTo manage push notifications on Firefox, use the following steps: Step 1: Open Firefox and click on the three horizontal lines in the top-right corner of the browser window.
Steps to turn off push notifications on MS EdgeTo manage push notifications on MS Edge, follow these steps: Step 1: Open MS Edge and click on the three horizontal dots in the top-right corner of the browser window.
Step 4: Scroll down to find the "Notifications" section and click on it.
Step 5: In the Notifications settings, you can choose to block all notifications by toggling the switch next to "Ask before sending (recommended)" to the off position.
Step 6: Alternatively, you can manage notifications on a per-site basis by scrolling down to the "Allow" section and selecting the websites from which you want to receive notifications. Steps to turn off push notifications on SafariTo manage push notifications on Safari, use the following steps: Step 1: Open Safari and click on "Safari" in the top-left corner of the screen.
Step 3: In the Preferences window, click on the "Websites" tab.
Step 5: In the Notifications settings, you can choose to block all notifications by selecting the "Deny" option next to "Allow websites to ask for permission to send push notifications."
|


Remove Asemolgaa.com Adware With Antimalware
Though manual identification is possible, using reliable anti-malware software significantly simplifies the process. Using these tools, your system can be inspected in a finer detail, and hidden adware can be more easily recognized.
Threat Removal With Malwarebytes Malwarebytes is a leading provider of antimalware software, dedicated to protecting users from the ever-growing threat of malware. With its advanced technology and comprehensive approach, Malwarebytes offers a robust solution to detect, prevent, and remove malicious software from computers and devices. Malwarebytes' antimalware software combines multiple layers of protection, including real-time scanning, behavior monitoring, and artificial intelligence, to identify and eliminate threats in real-time. This proactive approach ensures that users are protected from both known and emerging threats. It’s available as a free tool and we recommend it as a must have app on your device to keep your protected against threats. Step 1: Download Malwarebytes for your device by clicking on the link based on your operating system. Malwarebytes is available free of cost and can be used over cross platforms. However, the premium version offers more versatile features and protection to your device. You can register the app to premium version through in-app options or official website. Download Malwarebytes For Windows/Mac Step 2: Navigate to the folder where the installer file is downloaded and double click on it. The file is usually stored under “Downloads” directory.
Step 3: Once the installer runs, it opens Malwarebytes Setup Wizard with two options as Install and Advanced options. The Advanced option basically allows you to choose a directory where you want the app to install, select your language, and adding shortcuts. Just click on Install.
Step 4: You will now be asked to choose the type of protection you want, either Personal or Business. Based on your requirements, select the right option and click Next button.
Step 5: The setup will ask you to add a browser guard to keep your browsing safe. It’s an optional thing, but still you can choose adding the plugin to browsers to keep your online data safe. Once selected the appropriate option, proceed further to install the app. The installation process may end in a few minutes.
Step 6: After the installation is successfully done you can see a success notice. Click on Open Malwarebytes button now.
Step 7: After the Malwarebytes launches, click on the Scan button to start the scanner to identify present threats on your device.
Step 8: Sit back, wait and relax till the scanner searches for malicious traits on your computer. It may take time depending upon the storage size, and computer resources as well.
Step 9: After the scanning process completes, a screen with detected threats will appear before you. To remove detected malware or potentially unwanted programs from your device, click on Quarantine button.
Step 10: Malwarebytes may also ask you to restart your computer to complete threat removal process. So, just restart your computer. That’s it, your computer is now malware free. Threat Removal With Spyhunter SpyHunter is a powerful antimalware software designed to protect your computer from various threats, including malware, spyware, and adware. With its advanced scanning technology, SpyHunter can detect and remove harmful programs that may be lurking in your system. It also offers real-time protection to prevent new infections from occurring. SpyHunter is known for its user-friendly interface, making it easy for both novice and experienced users to navigate. It provides regular updates to ensure that your computer remains secure against the latest threats. If you're looking for a reliable antimalware solution, SpyHunter is definitely worth considering. Step 1: Download Spyhunter 5 for your device by clicking on the link based on your operating system. SpyHunter 5 Anti-Malware provides a 7-day fully functional Free Trial (15 days for Mac) with Credit card required, No charge will apply upfront. No charge if you cancel 2 business days before the trial ends. Download Spyhunter For Windows Download Spyhunter For Mac Step 2: Go to the directory where the installer is downloaded and stored. The file is usually stored under “Downloads” directory. Double click on the installer to run setup.
Step 3: Select your preferred language and click on OK button. This will initialize the installer, so click on the Continue button when prompted.
Step 4: You will be asked to accept the EULA and Privacy policy of the application to proceed the installation. So choose the option I accept the EULA and Privacy Policy, and click on Accept & Install Button.
Step 5: Now, the installation process will begin and progress bar can be seen. The process may take a while to complete, after which a successful installation notice is shown.
Step 6: The Spyhunter launches itself automatically following installation. Below mentioned screen will appear before you.
Step 7: Also, the scanner will start scanning your computer to identify present threats inside your device. During scan, it will show you detected threat’s name, security level, and details about the threat as well. Sit back & relax to complete the scan process
Step 8: The scanner once finished, click on Next button to proceed further.
Step 9: The app will ask you to buy its licensed version to complete the removal process. Alternatively, you can also avail a 7 day free trial under which the software will be fully functional to remove all threats.
Threat Removal With Combo Cleaner Combo Cleaner is a comprehensive security software designed to protect and optimize your Mac system. With its powerful features and user-friendly interface, Combo Cleaner offers a range of tools to keep your device safe from malware, adware, viruses, and other threats. It scans your computer thoroughly, detects and removes any malicious software it finds, and also cleans up junk files and unnecessary clutter to improve system performance. Combo Cleaner is known for its advanced algorithms and real-time protection, ensuring that your Mac remains secure and optimized at all times. Whether you are a casual user or a professional, Combo Cleaner provides a reliable solution to ensure the safety and efficiency of your Mac. Step 1: Click download button below to get Combo Cleaner for Windows/Mac on your device. Combo Cleaner Antivirus is available to download as free scanner. The scanner will scan and detect all inside threats on device, but users need to buy its license key to avail complete removal of threats. Download ComboCleaner For Windows Download ComboCleaner For Mac Step 2: Browse to the directory where the installer is downloaded (usually in ‘Downloads’ folder), and double click on the installer to start installation.
Step 3: The installer begins and will ask you to set some necessary parameters like creating shortcuts, starting the app on windows startup and more. Choose the right options based on your needs, and click Next button.
Step 4: The installer now starts to install Combo Cleaner on your device and will complete it in just a few minutes.
Step 5: Once the installation completes, click on Finish button. Do make sure the option “Launch Combo Cleaner and run initial computer scan” is checked.
Step 6: The initial computer scan will start with updating and installing Combo Cleaner antimalware database updates. It will take some time depending upon your internet speed, and other resources.
Step 7: After the database updates are successfully installed, the antimalware solution will start scanning your device for present malware threats. Sit back and relax to let the app complete its process.
Step 8: After the scanning completes, a screen appears with all detected threats on your device. Just click on Remove All Threats button. Threat Removal With Norton Antivirus Norton 360 is a comprehensive antivirus software that offers robust protection against various online threats. With its advanced features and real-time scanning capabilities, it ensures the safety of your devices and personal information. This antivirus software not only detects and removes viruses, malware, and spyware but also provides a firewall to protect your network from unauthorized access. Norton 360 is compatible with multiple platforms, including Windows, Mac, and mobile devices, providing a seamless experience across all your devices. Its user-friendly interface allows you to easily navigate through its various features and customize your security settings according to your preferences. Stay protected with Norton 360 and enjoy a worry-free online experience. Step 1: Click on the button below to get Norton 360 protection for your device. Norton 360 Antivirus is available and accessible over cross platforms. It provides a 7 day fully functional free trial with Credit Card. No charge deduction till trial period. Download Norton 360 For Windows/Mac Step 2: Download the installer and run it on your device. Click on Install button to proceed with installation steps further.
Step 3: The installation process will begin now with an increasing progress bar. Wait for the installation to complete.
Step 4: After the installation process completes, launch Norton 360 and click on Quick Scan option to start scanning device for threats.
Step 5: The scanner will initialize scanning computer for threats. This process may take some time depending upon the disk size and hardware resources of device.
Step 6: Once the scanner finishes, it will take all appropriate action against detected threats automatically. Click on Finish button to close the app.
Step 7: If you have purchased Norton’s license key, we suggest you to activate the application by clicking on Activate Now option.
Step 8: Norton 360 will now connect with its server to complete activation.
Step 9: Congratulations, your device is now protected with Norton 360 against all threats. |


To effectively protect your system from Odesart.com ads and other malicious software, it is important to keep your security software up-to-date. Regularly scanning your system and browsers for threats and keeping software and operating systems updated can significantly reduce the risk of adware infection.
Preventing Future Intrusive Notifications
To prevent future undesirable notifications:
- Be cautious about granting permissions to dubious websites.
- Keep your device’s software and security measures up to date.
- Install pop-up blockers or ad blocker extensions on your web browser.
- Regularly check your applications and extensions, removing any you don’t recognize.
Tip To Remember: Being proactive about your device's security will help greatly in minimizing unwanted distractions from sites like Asemolgaa.com.
Importance of Regular System Maintenance
Regular system maintenance is an important aspect of ensuring adware or any other unwanted programs stay off your device. Keeping your software, including your operating system and web browsers, up to date is essential. Use antivirus software and regularly run scans to detect any malicious activity quickly.

The described procedure caters to the removal of Odesart.com ads specifically, but it can be effective with other forms of adware as well. If all else fails, consult with a computer specialist to assist in the removal of the adware on your device.
Final Thoughts
Ensuring a safe browsing experience involves understanding the tools and settings at our disposal. By learning how to manage notifications, specifically by removing unnecessary ones like Asemolgaa.com, we can regain control of our digital lives. The details provided in this document serve as a guide to navigate the process in different browsers.
Regardless of the browser you use, with the right steps, you can disable pesky notifications and provide feedback to the browser about unwanted content. Remember, while some notifications can be beneficial, it is crucial to maintain a balance and ensure that your online experience is not compromised.
Frequently Asked Questions about Virus/Malware
A computer virus is a type of malware that spreads between computers and damages data and software. It is a program that infects files or system areas and makes copies of itself. Some viruses are harmless, while others can damage or destroy files. Unlike worms, viruses require user action to spread. They used to be spread through portable media, but now they are primarily spread through email messages. To avoid virus infections, it is important to not open unknown email attachments and to view email messages in plain text.
Viruses spread by infecting files or the system areas of a computer's hard drive and making copies of themselves. They can infect other programs on the same computer or on other computers connected over a network. In the past, viruses were primarily spread through portable media such as floppy disks, but now they are mainly spread through email messages. When you open an attachment or click a link in an email message, most viruses are activated. It is important to be cautious of email attachments and links, limit HTML in email messages, and view them in plain text to avoid virus infections.
A worm is a type of malware or malicious software that can rapidly replicate and spread across devices within a network. Unlike a virus, a worm can self-replicate and spread automatically without the need for human intervention. Worms can infect computers through software vulnerabilities, spam email or instant message attachments, or removable drives. Once a worm infects a device, it continues to spread to other systems, causing disruptions and potential data loss. Mitigating a worm attack involves containment, inoculation, quarantine, and treatment. It is crucial for businesses to have a coordinated response plan in place to effectively respond to worm attacks.
A Trojan Horse, or Trojan, is a type of malware that disguises itself as legitimate software or code. Unlike viruses or worms, Trojans require deliberate action from the user to infect a device. Once installed, Trojans can perform various actions, such as modifying data, stealing sensitive information, exploiting vulnerabilities, installing malicious programs, extorting users, setting up backdoor access, or carrying out DDoS attacks. There are different types of Trojans, including exploit Trojans, downloader Trojans, ransom Trojans, backdoor Trojans, fake AV Trojans, rootkit Trojans, SMS Trojans, banking Trojans, and Trojan GameThief. Some recent examples of Trojan attacks include Zloader, QakBot, and Andromeda.
Adware and browser hijackers are similar in some ways but have distinct differences. Adware is a type of software that displays unwanted advertisements on a user's device. It is often bundled with freeware or shareware and can track user behavior and collect personal information. On the other hand, browser hijackers are a specific type of malware that modifies browser settings without the user's consent, redirecting them to malicious websites. While adware may be a component of browser hijackers, not all adware is classified as browser hijackers. Both adware and browser hijackers can negatively impact user experience and compromise privacy and security. It is essential to have proper security measures in place to protect against both adware and browser hijackers.
Ransomware is a type of malware that encrypts a victim's data and holds it hostage until a ransom is paid. It prevents users from accessing their systems or files by either locking the screen or encrypting the files themselves. Ransomware can spread across networks and paralyze entire organizations. It uses asymmetric encryption, which makes it extremely difficult to decrypt files without the private key. Ransomware is often distributed through email spam campaigns or targeted attacks. It has been on the rise since the WannaCry outbreak in 2017 and has become more sophisticated, incorporating techniques like data theft and double extortion to pressure victims into paying the ransom.
To protect your computer from viruses, you can follow these steps:
- Install antivirus software: Use reputable antivirus software and keep it updated to detect and remove viruses.
- Keep software up to date: Regularly update your operating system and software to patch any security vulnerabilities.
- Backup your computer: Regularly backup your important files to an external storage device or cloud storage to protect against data loss from viruses.
- Use strong passwords: Create strong, unique passwords for your accounts to prevent unauthorized access.
- Be cautious of downloads: Avoid downloading files from untrusted sources and be cautious of email attachments, as they can contain viruses.
- Install an ad-blocker: Ad-blocking software can help prevent malicious ads that may contain viruses.
- Run virus scans regularly: Schedule regular virus scans on your computer to detect and remove any malware.
- Avoid suspicious links: Be cautious when clicking on links, especially in email messages, as they can lead to malicious websites. Hover over links to verify their legitimacy before clicking.
By following these steps and exercising caution while browsing, you can minimize the risk of viruses infecting your computer.
The signs of a malware infection include slow performance, unexpected freezing or crashing, diminished storage space, changes to your browser homepage, browser redirects, new browser toolbars, annoying pop-ups, unusual error messages, fake virus alerts, excessive ads, system crashes, loss of disk space, increased internet activity, changes in browser settings, disabled antivirus software, and loss of access to files. These symptoms indicate that your device may be infected with malware and should be diagnosed and treated promptly.
To avoid falling for tech support scams related to malware, you can follow these tips:
- Be cautious of unsolicited phone calls claiming to be tech support. Legitimate companies usually don't reach out to customers in this manner.
- Never call the phone number in a pop-up message on your computer. These pop-ups can be fake and are often used as a tactic by scammers.
- Update or download legitimate security software and regularly scan your computer for malware. Delete anything the software identifies as a problem. If you need assistance, seek help from trusted sources.
- Be skeptical of anyone claiming to be a tech support staffer from a reputable company like Microsoft. Don't provide personal information or grant remote access to your computer unless you've verified their identity.
- Educate yourself about common scam techniques and stay informed about the latest threats. This will help you recognize red flags and avoid falling for scams.
If your device is infected with malware, there are several steps you can take to address the issue:
- Confirm the infection: Look for unusual behavior on your device, such as slow performance, frequent crashes, or excessive pop-up ads. This will help you determine if your device is indeed infected with malware.
- Disconnect from the internet: Unplug your device from the network to prevent the malware from spreading or communicating with its command and control servers.
- Run anti-malware software: Use reputable anti-malware software to scan your device and remove the malware. Make sure the software is up to date and perform a thorough scan of your system.
- Back up critical files: Before taking any further action, back up your important files and data to ensure they are not lost during the malware removal process.
- Reinstall the operating system if necessary: If the malware has deeply infected your device and cannot be completely removed, consider reinstalling the operating system. This will wipe out all the existing data and software on your device, so make sure you have backups of your important files.
- Consider data recovery services: If you have lost any data due to the malware infection or the subsequent removal process, you may want to consult professional data recovery services to retrieve your lost files.
Remember to keep your device's software up to date, use strong passwords, and be cautious of suspicious links and downloads to prevent future malware infections.

Nishant Verma is a senior web developer who love to share his knowledge about Linux, SysAdmin, and more other web handlers. Currently, he loves to write as content contributor for ServoNode and also collaborated with MRLabs now.